 |
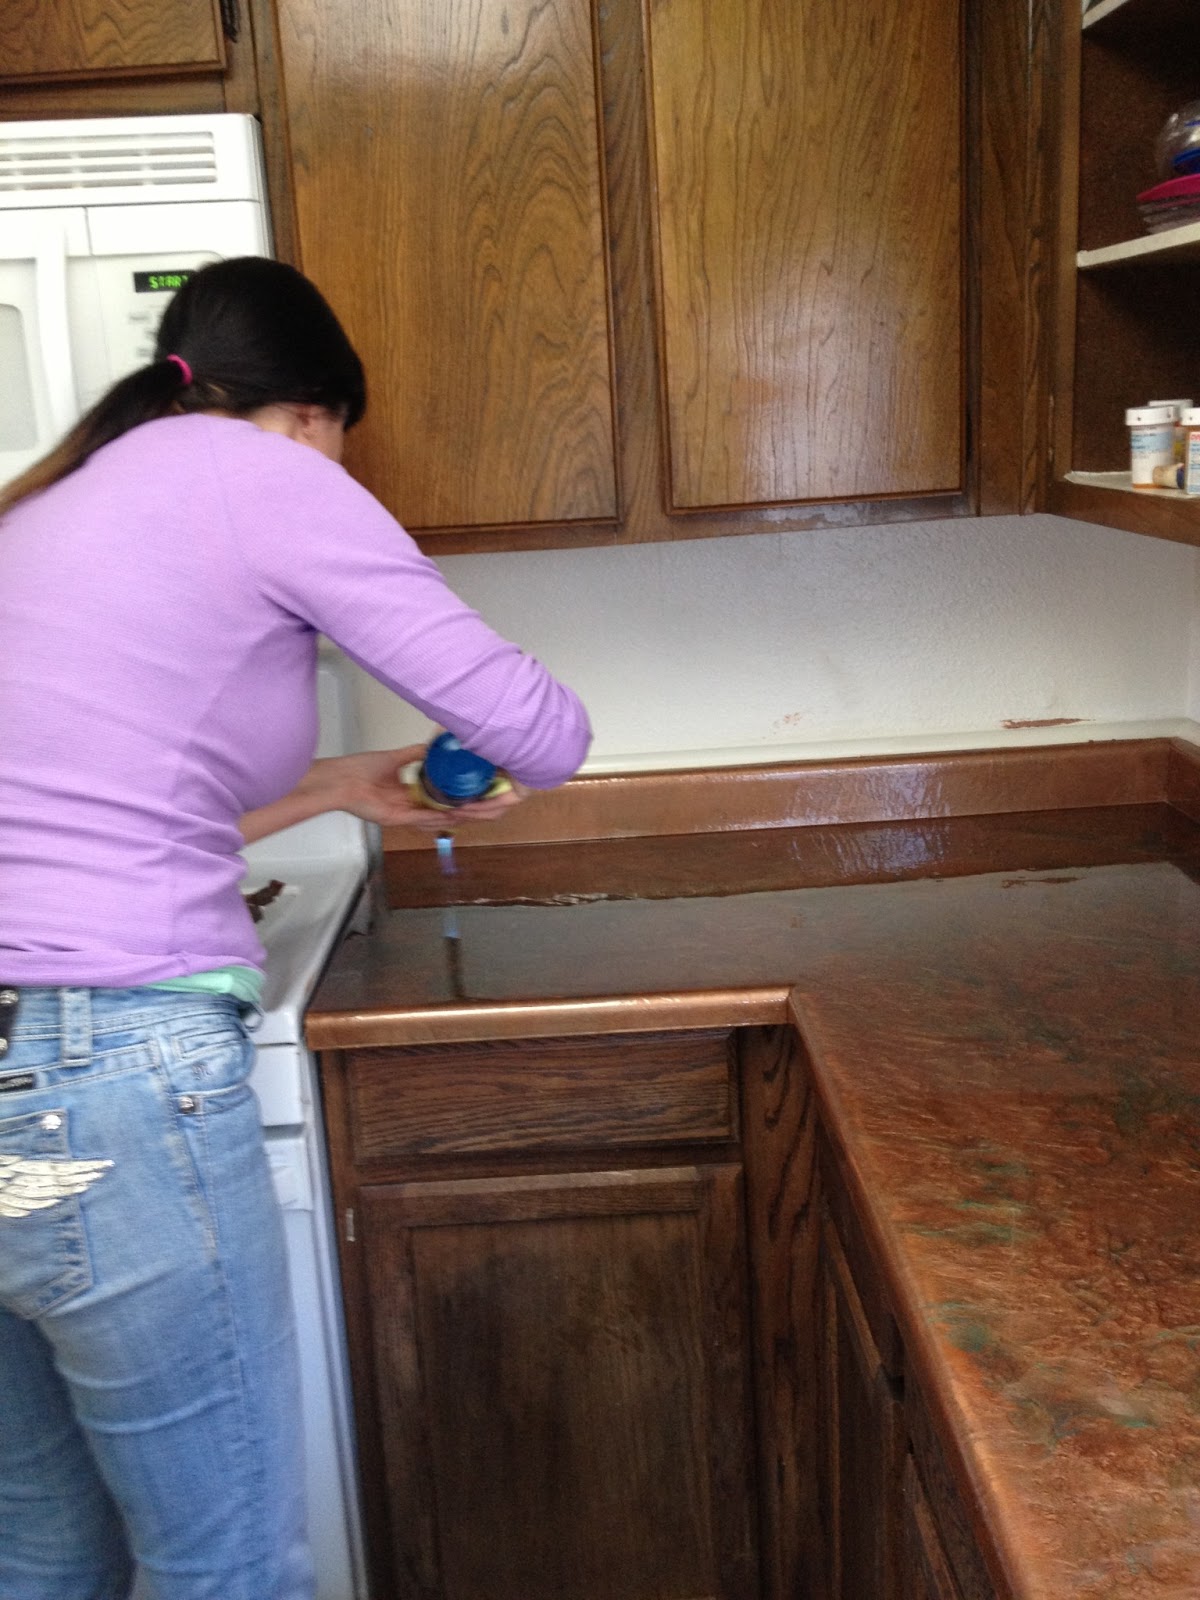
Old formica countertops. They look worse in person |
I looked at Rustoleum Countertop Transformations - this still intrigues me and I might try one day, but not in my kitchen. I wanted to try it in my bathroom, but it can't be used over corian or cultured marble etc. I also considered doing a concrete overlay but it was pretty costly for a kit. I prefer to go with kits, so I am not surprised when I don't have all the materials I need. It's a good way to get your foot in the door for trying a new home project. Just when I was about to buy a concrete kit (about $450) I stumbled upon Countertop Epoxy. You've gotta check out their tutorial video. SO COOL!!
 |
My Craigslist score - $20!! BEFORE |
 |
My awesome custom table! |
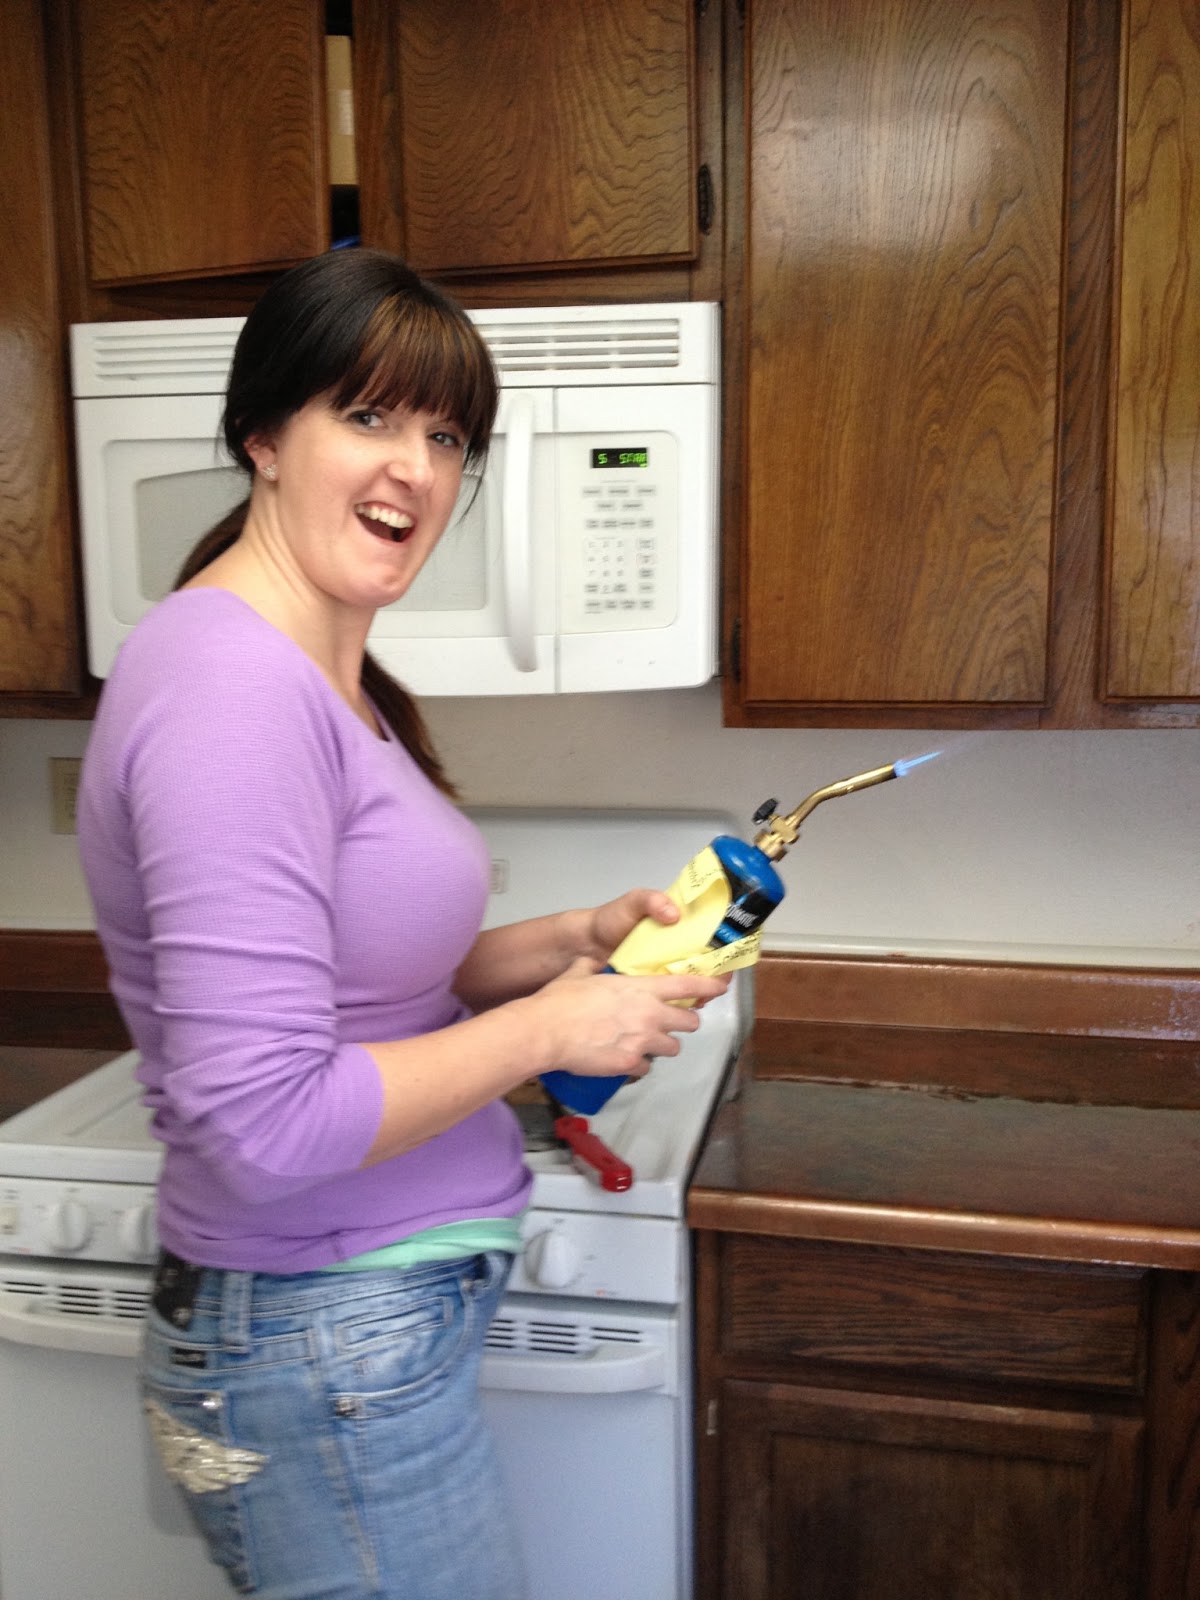
Levi, is the most awesome guy - an ex-Marine who totally hooked me up with my kit. He is incredibly helpful and knowledgeable. I chose the Copper Patina kit. Levi suggest that I cover a table first to get the feel of the process. So I bought a cheap table off of Craigslist. Found this baby for $20 and it is HEAVY SOLID WOOD. Score! I had a pal come over and experience the process with me and it was a lot of fun.
 |
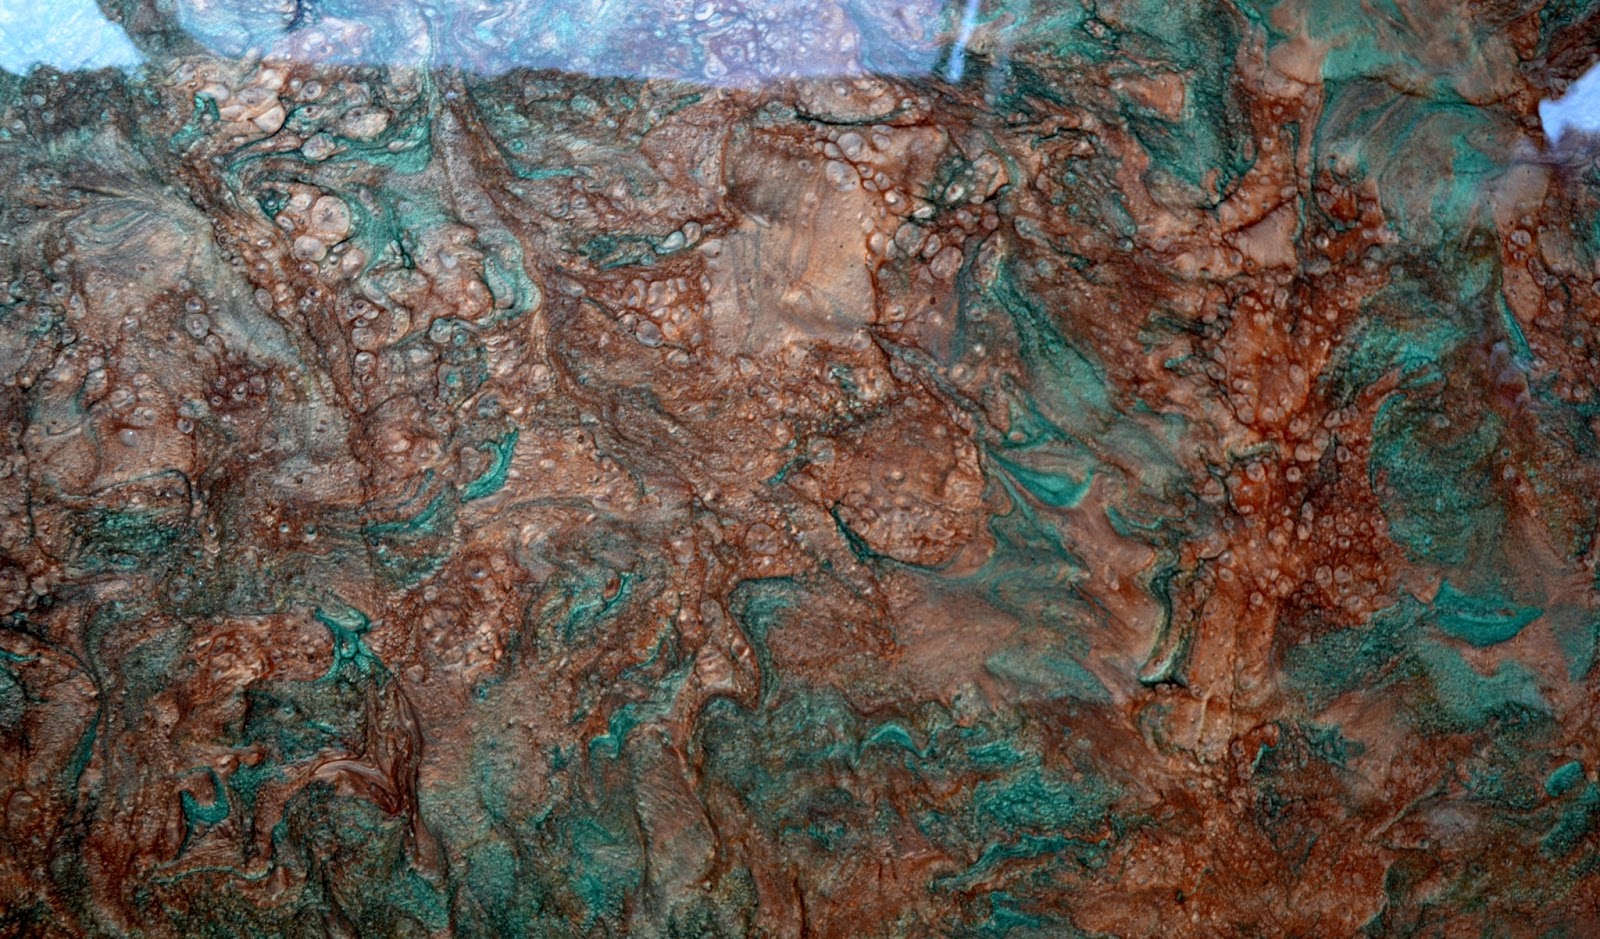
First layer of copper |
 |
BADASS |
I did my first color and was already in love. (My first attempt at the counter resulted in a bit of a disaster on my part...I forgot to add the hardener - who does that??) But I called Levi in a panic and he talked me through it very calmly. And if you know me at all I am quite the spaz. My second attempt went very smoothly. FOLLOW THE DIRECTIONS!! I used a putty knife to spread the epoxy the second time and it was 100% easier. Like spreading honey.
Then I mixed more epoxy and added the accent color - forest green. Sounds weird but man does it make the counters POP! I poured the accent color on top of the copper in random lines and patterns. Then I used a paint brush to spread it around a little and get it into the copper.
 |
WAY TOO FUN! |


I would do this again in a heartbeat. I am sure it will make an appearance in the next house we live in. This is a fun project and will bring a very unique look to your home. The best part is, it is VERY heat resistant (up to 500 degrees!) and can withstand over 12000 psi - even stronger than concrete.


Thanks, Levi! I love it!!